All you need are basic supplies: a pencil, paper or sketchbook, eraser, and pencil sharpener. If you’re uncertain about the optimal pencil tools, refer to the final section for guidance
Enhance your precision in depicting values within your artworks by acquiring and refining your pencil drawing techniques. Experiment with the marks you create, and explore innovative approaches to elevate your drawing skills.
Layering
Building up pencil marks is distinct from layering paint, given that graphite lacks transparency. Unlike painting, you can achieve a polished final appearance in a single layer when working with graphite.
In drawing, layering involves commencing with a light sketch and gradually incorporating darker areas to establish shadows. Many artists adopt this technique to strategically map out the placement of elements before committing to indelible dark lines that pose greater challenges for erasure. This layering process serves as a thoughtful approach to refining the composition and ensuring precision in the depiction of shadows and details.
Underdrawing
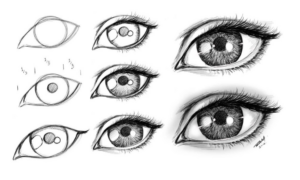
The initial underdrawing serves as the foundational layer in the artistic process, particularly for artworks demanding precision and substantial time investment. In cases where accuracy is paramount, initiate the drawing with a delicate, light outline highlighting the primary features of the subject. Subsequently, layer upon this foundation with shading to add depth and dimension.
For enhanced precision, consider creating a preliminary sketch on a separate sheet of paper. You can then transfer this sketch using tracing paper or the grid method, ensuring a more accurate representation in the final artwork.
An effective technique for creating an accurate portrait underdrawing is the Loomis Method. This approach involves starting with basic shapes to establish proportional measurements, utilizing these guides to meticulously render the facial features. Employing such constructive methods ensures a solid foundation for the subsequent stages of the drawing process.
Shading techniques
Hatching, stippling, and tonal sketching are shading techniques employed in art to generate a range of values within your artwork. In the context of art, a value denotes the degree of lightness or darkness in a color. Implementing these diverse shading methods enables you to craft highlights and shadows, infusing your drawings with depth and a tangible sense of form.
Exploring these shading techniques not only provides a means to control the interplay of light and shadow but also grants you the artistic freedom to convey mood, atmosphere, and texture. The mastery of hatching, stippling, and tonal sketching enhances your ability to evoke nuanced emotions and storytelling elements, contributing to the overall richness of your artistic expression.
Hatching
Hatching involves the skillful use of parallel lines to convey the illusion of light and shadow. Increasing the proximity of lines intensifies the darkness in a drawing, while greater spacing contributes to highlights and mid-tones. Applying more pressure to the pencil results in darker areas.
To excel in the hatching technique, adopt a loose grip on the pencil. Instead of exerting force on the lead and relying on wrist movements, maintain a straight wrist and employ your elbow for drawing. This approach produces longer, lighter, and more sweeping
hatched lines. For extended hatch lines, experiment with keeping your elbow stationary and using your shoulder for movement. While reconsidering how to hold a pencil may seem fundamental, especially for self-taught artists, mastering these basics is crucial for honing your artistic skills.
Cross hatching
Cross hatching is a variation of the hatching technique, involving the drawing of parallel lines in close proximity to create both light and dark values. Additional perpendicular lines are then layered on top in a similar hatching style. Renowned artists like Rembrandt employed this method in their etchings, ink drawings, and silver point pieces. Its versatility is evident as it can be executed with various tools such as pen, graphite, charcoal, or ink. When combined with other techniques on the list, cross hatching allows for the creation of diverse visual effects. Upon close inspection, cross hatching imparts a captivating texture to the drawing, while stepping back reveals a seamless and smoother shading appearance.
Stippling
Similar to hatching, stippling involves creating a repetitive pattern on paper to depict areas of light and dark in a drawing. Utilize a dotting motion to establish different values, with closer dots representing darker areas and more spaced-out dots indicating highlights and light tones.
Keep in mind that the thickness of the dots can be influenced by the sharpness of the pencil; an unsharpened pencil will result in thicker dots. Opt for a softer pencil (8B to B) for darker marks, while a harder lead pencil (F, H, or HB) will produce lighter marks. Mechanical pencils are particularly effective for stippling.
Invest in a high-quality pencil, such as those from Caran D’ache, as cheaper pencils are more prone to breaking.
To employ this technique, hold the pencil vertically and close to the paper, allowing your hand to drop and execute the repeating dotting action. Begin slowly to maintain precision, but with practice, you’ll find stippling becomes an easily achievable technique. Once mastered, you’ll gain confidence in creating drawings with speed and proficiency.
Tonal sketching
This shading method is straightforward and perhaps the most instinctive among drawing techniques. Simply exert pressure on the pencil where shadows are intended in the artwork.
For a uniformly shaded effect, angle the pencil slightly and move it gently back and forth. Softer lines are achieved with unsharpened pencils, and it’s crucial to opt for a soft pencil, ranging from 2B to 8B, depending on the desired darkness of the shading.
Additionally, this shading technique provides a direct and immediate way to infuse depth and dimension into your drawings. It allows for a spontaneous and expressive approach to shading, making it accessible for artists of various skill levels.
Scumbling
Scumbling stands out as an additional shading method, involving the layering of small circular marks to produce a textured effect. Precision in creating these circles is not essential; the technique allows for a more organic and varied appearance. Applying increased pressure to the pencil results in darker areas in the drawing. For those using colored pencils, the technique offers the flexibility to overlay different colors, allowing for adjustments in tones and hues to enhance the visual richness of the artwork.
This technique provides artists with a versatile tool to convey a range of textures and add character to their drawings. Experimenting with scumbling opens up opportunities for creative expression, making it a valuable addition to an artist’s repertoire of shading techniques.
Loose sketching
This sketching approach imparts a more relaxed and effortless style, offering a valuable technique, especially for beginners transitioning from precise fine lines. Sketching loosely provides the opportunity to plan compositions and refine drawing accuracy without the fear of making mistakes. Before outlining the final drawing, start with a loose sketch, allowing for easy erasure of lines that may not align with your vision.
The emphasis here is on the broader aspects—the composition and interaction of different elements. Following this method, you have the flexibility to erase and add details later or leave the drawing in its sketch form.
To achieve a looser drawing, adjust your grip by holding the pencil further up the casing and employ sweeping strokes, moving your elbow instead of relying on wrist or finger movements. Gentle pressure on the paper is sufficient when experimenting with this technique.
This approach not only encourages creative freedom but also helps artists develop a more intuitive and expressive style in their sketching practice.
Gesture drawing
Similar to creating a loose sketch, the objective of gesture drawing is to capture the movement of the subject in an expressive manner. This technique is particularly applicable when depicting the human form, emphasizing the action and pose of the figure.
When employing this method, it’s crucial to time yourself, keeping the process quick and avoiding overthinking the placement of lines. Target around one minute per drawing and refrain from delving into details such as facial expressions or hands; instead,
concentrate solely on capturing the overall form of the figure. Gesture drawing serves as a fundamental step in the initial stages of figure drawing, proving especially beneficial for those practicing life drawing. Portrait artists, in particular, find this exercise invaluable in refining their ability to convey dynamic and expressive poses.


