Have you ever found yourself yearning for a creative outlet that doesn’t require hours of painting? If so, scrapbooking might be the perfect solution for you. Personally, I’ve incorporated this artistic method into both my bullet journal and a dedicated scrapbooking book, allowing for the easy creation of monthly setups with various supplies like paper and stickers. The beauty of it lies in the fact that, by the end, you’ll have a wonderfully adorned journal without the need for extensive painting.
Today, let’s delve into this delightful craft hobby, offering you a glimpse into the world of scrapbooking and detailing how this creative endeavor unfolds. It’s a simple yet visually rewarding way to infuse your journals and memory-keeping with a touch of individuality and charm. So, join me as we explore the art of scrapbooking and discover how it can be a source of enjoyable and aesthetically pleasing crafting. ♥
What is scrapbooking?
At its core, scrapbooking is the art of crafting a visual narrative, a photo album or “scrapbook” that encapsulates cherished memories. The process involves affixing photos in an album and adorning them with a creative array of stickers, fonts, and other charming elements. It’s an imaginative endeavor aimed at capturing and preserving memories through the personalized crafting of an album, making scrapbooking a truly creative and hands-on DIY hobby.
The beauty of scrapbooking lies in its versatility, with an array of methods that cater to diverse preferences. What makes it particularly appealing is its inherent simplicity and the freedom it affords for creative expression. Unlike other crafts, there’s no need for advanced painting skills or adherence to rigid rules. Scrapbooking invites an uncomplicated yet highly creative approach, offering a delightful way to document life’s moments.
One intriguing fusion within this realm is the combination of scrapbooking with the popular bullet journaling technique. Imagine the fusion of the two, resulting in a uniquely styled scrapbook-style bullet journal. This innovative approach allows enthusiasts to seamlessly integrate their planning and memory-keeping in a beautifully designed book, reflecting the fusion of organization and creativity.
I. Understanding Scrapbooking
Definition:
- Scrapbooking is the art of creating personalized, visually appealing albums or pages that showcase and commemorate memories through a combination of photographs, memorabilia, decorative elements, and journaling.
History:
- The roots of scrapbooking can be traced back to the 15th century when commonplace books were popular. However, the modern concept of scrapbooking gained momentum in the 19th century with the introduction of photographic prints. It has since evolved from simple albums to intricate and artistic creations.
II. Essential Tools and Materials
Albums:
- Choose an album that suits your style and preferences. Albums come in various sizes, materials, and designs, from classic leather-bound to more contemporary options.
Paper:
- Quality paper is the foundation of scrapbooking. Acid-free and lignin-free paper ensure the longevity of your creations. Patterned paper, cardstock, and specialty papers add visual interest.
Adhesives:
- Select acid-free adhesives to preserve the integrity of your materials. Options include double-sided tape, photo corners, glue dots, and adhesive runners.
Cutting Tools:
- Precision is key in scrapbooking. Invest in a good pair of scissors, a paper trimmer, and cutting dies for intricate shapes.
Embellishments:
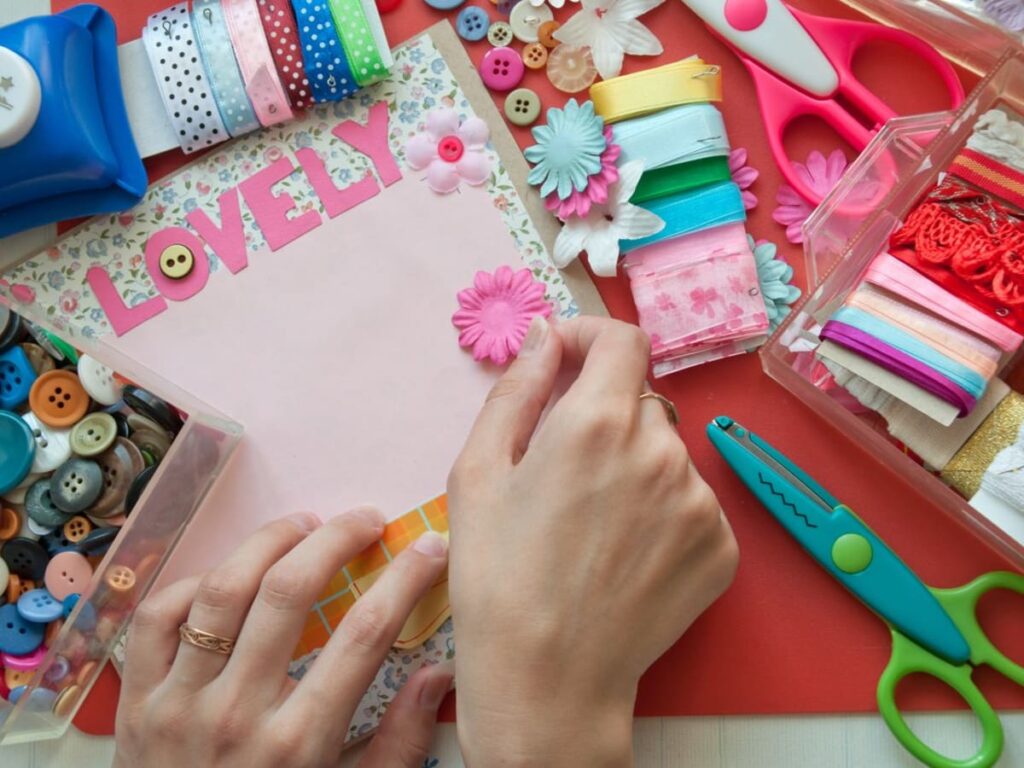
- Enhance your pages with embellishments such as stickers, ribbons, brads, buttons, and charms. These elements add texture, color, and personality.
Pens and Markers:
- Archival-quality pens and markers are essential for journaling. Choose pens that won’t fade over time, allowing your written memories to endure.
Photographs:
- High-quality prints are the heart of scrapbooking. Choose images that evoke emotions and tell a story. Consider using archival photo paper for printing.
Memorabilia:
- Incorporate meaningful items like ticket stubs, postcards, and letters to add depth and authenticity to your pages.
III. Techniques and Styles
Layout Design:
- Experiment with different layout designs, such as chronological arrangements, thematic layouts, or event-based pages. Consistency in design elements creates a cohesive look.
Layering:
- Create dimension by layering paper, photos, and embellishments. This adds visual interest and makes the page more dynamic.
Journaling:
- Journaling is a crucial aspect of scrapbooking. Write about the memories, emotions, and details surrounding the photos. Handwritten notes add a personal touch.
Theme-based Scrapbooking:
- Explore theme-based scrapbooking where each album or page is centered around a specific theme, such as vacations, birthdays, or milestones.
Digital Scrapbooking:
- Embrace technology by exploring digital scrapbooking. Software programs and online platforms offer tools for creating virtual scrapbooks with digital elements.
IV. The Impact of Scrapbooking
Preserving Memories:
- Scrapbooking provides a tangible and enduring way to preserve memories for future generations. It serves as a visual chronicle of personal and family history.
Creative Expression:
- Engaging in scrapbooking is a creative outlet that allows individuals to express themselves artistically. It fosters creativity, imagination, and attention to detail.
Strengthening Relationships:
- Collaborative scrapbooking sessions or sharing completed albums can strengthen bonds within families and friends. It fosters a sense of shared history and nostalgia.
Therapeutic Benefits:
- Scrapbooking has therapeutic benefits, offering a reflective and introspective process. It can be a cathartic outlet for expressing emotions and processing life events.
Meaningful Gifts:
- Handcrafted scrapbooks make thoughtful and meaningful gifts for various occasions. They convey a level of effort, love, and personalization that is deeply appreciated.
How does scrapbooking work?
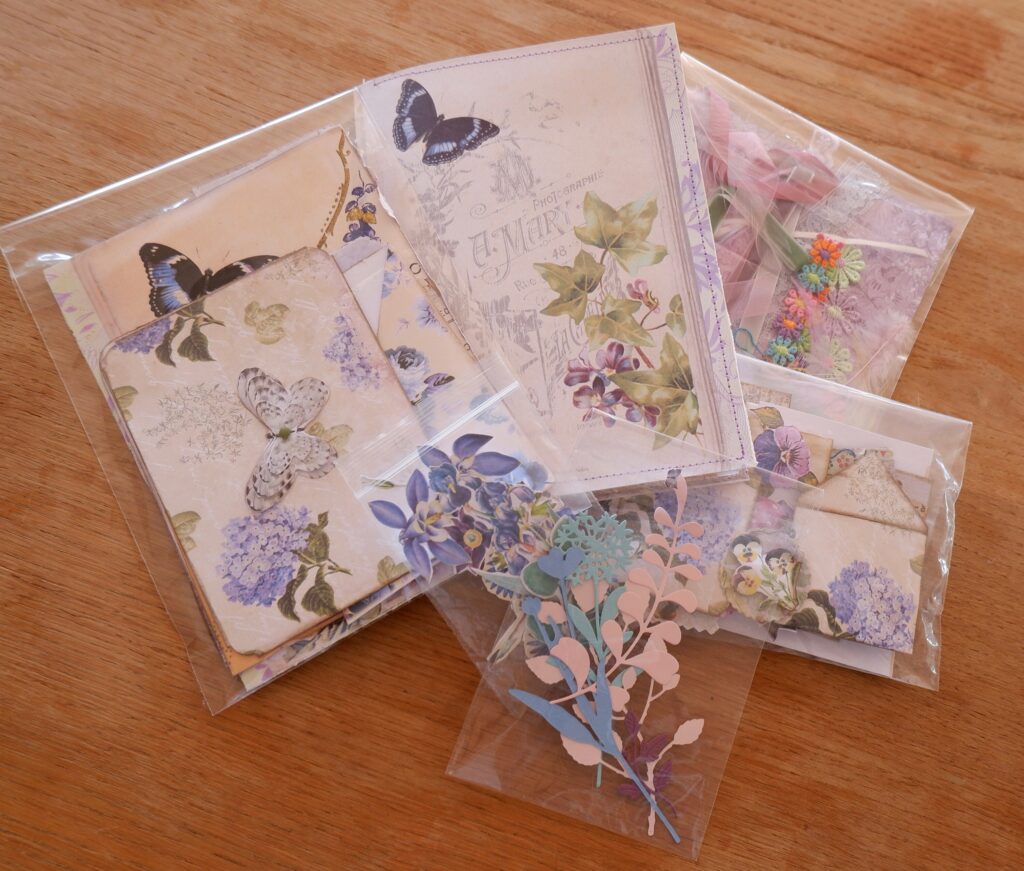
Scrapbooking isn’t about adhering to a rigid structure; it’s a journey of creative exploration. To embark on this artistic endeavor, having a few essential craft materials at your disposal can be incredibly helpful. Consider gathering a variety of papers, such as craft cardboard in an array of colors, old book pages, or kraft paper. Elevate your creations with the versatile charm of washi tape, and add personality with stickers, printables featuring doodles, memo notes, note papers, and sticky notes.
Enhance the visual appeal of your scrapbook with the classic touch of black and white fineliners, and introduce pops of color using different highlighters. To bring your elements together, equip yourself with reliable glue or a glue roller. For an organic touch, consider incorporating dried flowers or leaves into your designs, and experiment with the artistic potential of envelopes for added depth.
Personalization is key in scrapbooking, and the inclusion of Polaroid pictures or other captivating images—perhaps from your last vacation—adds a unique touch. For those who appreciate a diverse range of crafting materials, platforms like Etsy offer a treasure trove of unique supplies. Among the favorites are stickers, beloved for their ease of use and the seamless way they can enhance pages with aesthetically pleasing designs. In essence, scrapbooking is an art form where the possibilities are as varied as the materials you choose to weave into your creative tapestry.
Once you have all of your materials gathered, you can start scrapbooking right away. I always start by cutting out a few pieces of paper in various shapes and sizes. This adds visual interest and dimension to the page. Then, I begin layering different materials on top of each other, creating a sense of depth and texture. I love the way this looks, and I think it adds a touch of whimsy to my scrapbook pages.
When creating a scrapbook page, I often write a saying or quote that relates to the theme or overall message of the page. I find that this helps to tie everything together and create a more cohesive look. I also always place the key element, such as a photo or a piece of memorabilia, in the center of the page. This ensures that it is the focal point and draws the viewer’s eye.
I. Gathering Materials and Tools
Album Selection:
- Begin by choosing a suitable scrapbooking album. Albums come in various sizes, styles, and materials. Consider factors such as the size of your photos and the overall aesthetic you want to achieve.
Acid-Free Paper:
- Invest in acid-free and lignin-free paper to ensure the preservation of your photographs and other elements over time. Different types of paper, including patterned paper and cardstock, add depth and texture to your layouts.
Adhesives:
- Choose acid-free adhesives such as double-sided tape, glue dots, or adhesive runners to secure your photos and other items without damaging them.
Cutting Tools:
- Essential cutting tools include a good pair of scissors, a paper trimmer for straight cuts, and cutting dies or punches for creating intricate shapes.
Embellishments:
- Gather a variety of embellishments, such as stickers, ribbons, buttons, and charms. These decorative elements add personality and flair to your pages.
Pens and Markers:
- Archival-quality pens and markers are crucial for journaling and adding handwritten details to your layouts. Choose pens that won’t fade over time.
Photographs:
- Select high-quality photographs that evoke emotions and tell a story. Consider organizing your photos before starting to make the layout design process smoother.
Memorabilia:
- Collect meaningful memorabilia, such as ticket stubs, postcards, and letters, to incorporate into your layouts. These items add authenticity and depth to your scrapbook.
II. Planning and Layout Design
Choose a Theme:
- Determine the theme or focus of your scrapbook. It could be an event, a period of time, or a specific aspect of your life. Having a theme provides cohesion and helps guide your design choices.
Organize Your Content:
- Arrange your photos and memorabilia in a way that tells a cohesive story. Consider the chronological order, thematic grouping, or any other logical sequence that suits your chosen theme.
Sketch Your Layout:
- Before adhering anything to the pages, sketch a rough layout to plan the placement of photos, journaling, and embellishments. This helps visualize the overall design and ensures a balanced composition.
Consider Balance and Flow:
- Aim for balance and visual flow in your layouts. Distribute elements evenly, avoiding overcrowding in one area. Pay attention to the placement of colors, shapes, and sizes for a harmonious look.
III. Crafting the Layout
Adhere Photos and Memorabilia:
- Begin by adhering your photos and memorabilia to the pages. Use your chosen adhesives to secure these elements in place. Consider layering photos or using photo corners for added visual interest.
Add Decorative Elements:
- Integrate embellishments into your layout. This is where your creativity shines. Experiment with stickers, ribbons, buttons, and other decorative elements to enhance the aesthetic of your pages.
Incorporate Journaling:
- Journaling is a crucial aspect of scrapbooking. Write about the memories, emotions, and details surrounding the photos. Handwritten notes add a personal touch and provide context for future generations.
Create Dimension with Layering:
- Create depth and dimension by layering paper, photos, and embellishments. This technique adds visual interest and makes your pages more dynamic.
IV. Advanced Techniques and Styles
Experiment with Mixed Media:
- Explore mixed media techniques by incorporating paint, ink, or stamps into your layouts. This adds texture and a unique artistic flair to your scrapbook.
Thematic Scrapbooking:
- Dive into thematic scrapbooking where each album or page revolves around a specific theme, such as vacations, milestones, or family traditions.
Digital Scrapbooking:
- Embrace digital scrapbooking using software programs or online platforms. This allows for a more flexible and customizable approach to creating virtual scrapbooks.
V. Preserving and Displaying
Use Protective Sleeves:
- To safeguard your pages from wear and tear, place them in protective sleeves. These sleeves shield your layouts from dust, fingerprints, and other potential damage.
Store in a Cool, Dry Place:
- Store your completed scrapbooks in a cool, dry place away from direct sunlight. This helps prevent fading and deterioration of both photos and paper.
Share and Display:
- Share your completed scrapbooks with friends and family or display them in your home. Whether on a coffee table or a dedicated shelf, displaying your scrapbooks allows your memories to be celebrated and enjoyed.
As you can see from the four pictures included, I created this page using a variety of paper scraps, stickers, and fonts. I also painted a few sparkles and floral doodles for added detail. I always keep my designs simple and avoid anything too elaborate. I think this helps to create a clean and uncluttered look.
I love that there are no guidelines or rules when it comes to scrapbooking. It is a truly creative and expressive outlet. I encourage you to experiment with different materials and techniques to find your own unique style. Have fun and let your creativity flow.
Yes, you can definitely use your bullet journal for scrapbooking. In fact, it can be a great way to add a touch of personality and creativity to your planner.
Exploring DIY in Your Bullet Journal: A Perfect Match!
Simply stick your bullet journal spreads with the materials you described. Then, add a table with a fineliner, for example, for your monthly overview. You can also use stickers, washi tape, or pictures to decorate your weekly spreads.
You can easily create a cover page with old book pages, Polaroids, and stickers. Simply glue the old book pages to the front and back covers of your bullet journal. Then, add Polaroids and stickers as desired.
The possibilities are endless when it comes to using scrapbooking materials in your bullet journal. So get creative and have fun!
Here are some additional tips for using scrapbooking materials in your bullet journal:
· Use high-quality materials that will not bleed through the pages of your bullet journal.
· Use a light hand when applying stickers and washi tape to avoid damaging the pages of your bullet journal.
· Don’t be afraid to experiment with different colors and patterns.
· Most importantly, have fun and enjoy the process!
I. Understanding the Bullet Journal System
Origins and Basics:
- The Bullet Journal system, developed by Ryder Carroll, is a method of note-taking and organization that utilizes a simple yet effective system of bullet points, tasks, and rapid logging. It provides flexibility and adaptability, making it suitable for a wide range of planning styles.
Key Components:
- The core components of a Bullet Journal include an index, future log, monthly log, and daily log. These components serve as the foundation, and users are encouraged to adapt and expand based on their needs.
II. The DIY Spirit of Bullet Journaling
Customizable Structure:
- The DIY ethos of the Bullet Journal is evident in its customizable structure. Users have the freedom to design and organize their pages based on what works best for them. This flexibility allows for the inclusion of trackers, lists, and other personalized elements.
Materials and Tools:
- DIY in the Bullet Journal extends to the choice of materials and tools. From the selection of journals and pens to the addition of stickers, washi tape, and other decorative elements, users can curate a collection that reflects their personal style and preferences.
III. Incorporating DIY Elements
Monthly and Weekly Spreads:
- DIY enthusiasts often use their creativity to design visually appealing monthly and weekly spreads. This may involve hand-drawing calendars, incorporating themed elements, or experimenting with different fonts and colors.
Tracker Pages:
- Bullet Journals are renowned for their ability to house trackers for habits, moods, and goals. DIY aficionados can design unique tracker layouts, integrating visual elements and color-coded systems to make tracking more engaging.
Collections and Lists:
- The open-ended nature of Bullet Journals invites the creation of collections and lists tailored to individual needs. DIY enthusiasts can design pages for book lists, travel plans, or project management, allowing for a highly personalized organizational system.
IV. Creative DIY Techniques
Hand Lettering:
- Hand lettering is a popular DIY technique in Bullet Journaling. Users can experiment with different lettering styles to add a touch of artistry to headers, titles, and quotes within their journals.
Doodles and Illustrations:
- DIY enthusiasts often incorporate doodles and illustrations to enhance the visual appeal of their Bullet Journals. From simple icons to intricate drawings, these elements contribute to a unique and personalized journaling experience.
Sticker and Washi Tape Collages:
- Stickers and washi tape are versatile tools that allow for endless creativity. DIY enthusiasts can create collages, borders, and page dividers, adding pops of color and texture to their Bullet Journals.
V. Benefits of DIY Bullet Journaling
Personal Connection:
- The act of DIY in Bullet Journaling fosters a personal connection between the journal and its creator. Each page becomes a reflection of the individual’s thoughts, preferences, and creative expressions.
Increased Engagement:
- Engaging in DIY activities within the Bullet Journal enhances the overall planning experience. The process of designing layouts, experimenting with colors, and adding artistic elements can make daily planning more enjoyable and fulfilling.
Adaptability and Evolution:
- The DIY nature of the Bullet Journal allows for continuous adaptation and evolution. Users can modify layouts, experiment with new techniques, and refine their journaling style over time, ensuring that the journal grows alongside the individual.
VI. Tips for Successful DIY Bullet Journaling
Start Simple:
- For beginners, it’s advisable to start with simple DIY elements and gradually incorporate more complex designs as confidence grows.
Experiment with Tools:
- Explore different pens, markers, and decorative tools to discover what works best for you. The joy of DIY lies in the experimentation and finding tools that resonate with your style.
Seek Inspiration:
- Draw inspiration from online communities, social media platforms, and other Bullet Journal enthusiasts. The wealth of ideas and inspiration can fuel your creativity and help you discover new DIY techniques.

